|
|

|
|
|
These screen shots are for the Internet Connection Wizard ("inetwiz") that comes with Internet Explorer versions 5 and up. Quick Overview: The Internet Connection Wizard (inetwiz) quickly and efficiently sets up your Internet connection and e-mail client. It creates a new DUN connection and makes it the default connection. This means that Internet Explorer or Outlook Express dials up automatically when launched. The inetwiz also sets up an email account in Outlook Express. This becomes OE's default mail account, and is set to dial up through the connection created by inetwiz. It works on any version of Windows (95/98/ME/NT/2000/XP).
Opening the Internet Connection Wizard:
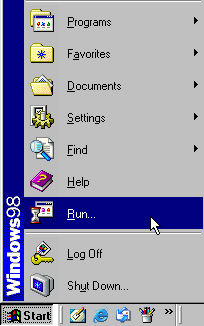
There are two common ways to access the Internet Connection Wizard. Click Start, then Run.
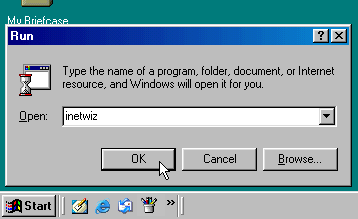
Type the word inetwiz in the Open field of the Run dialogue. Click OK.
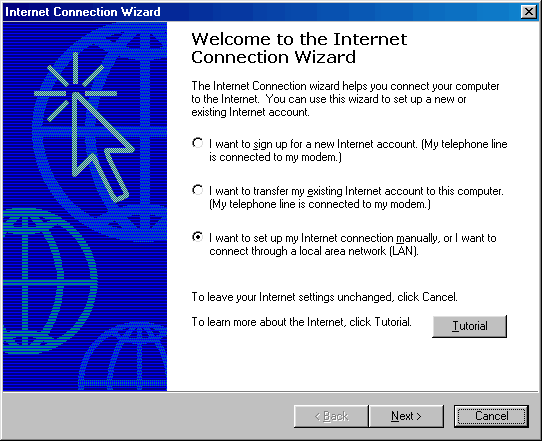
The Internet Connection Wizard appears. If you followed the Start->Programs->Accessories->Communications path (1), the following screen appears. Select the third option to set up manually. Click Next.
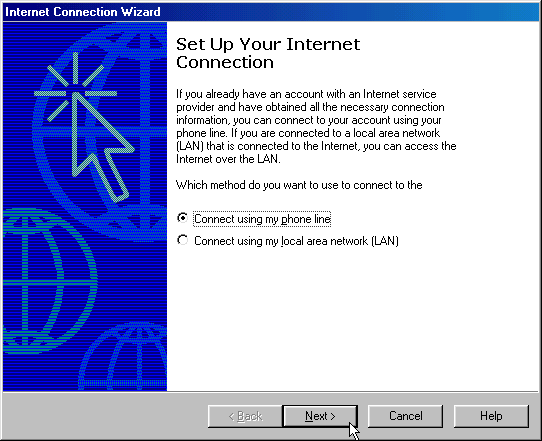
If you chose the Start->Run path (2), then the following screen appears. Select Connect using my phone line. Click Next.
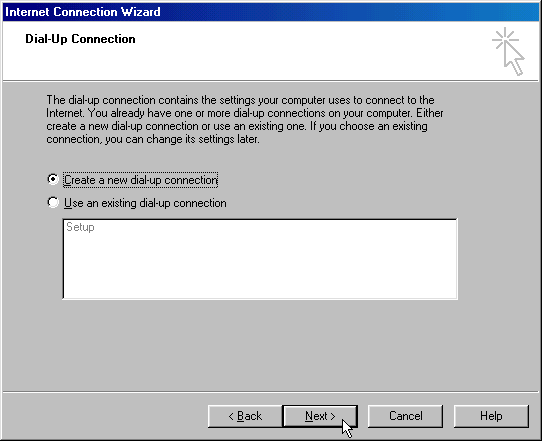
Select Create a new dial-up connection. Click Next.
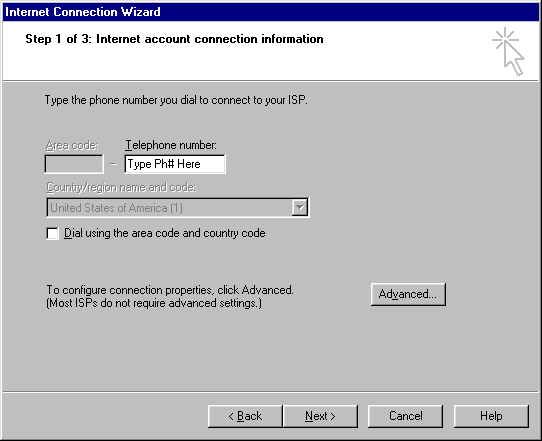
In the Area Code field, remove any numbers.
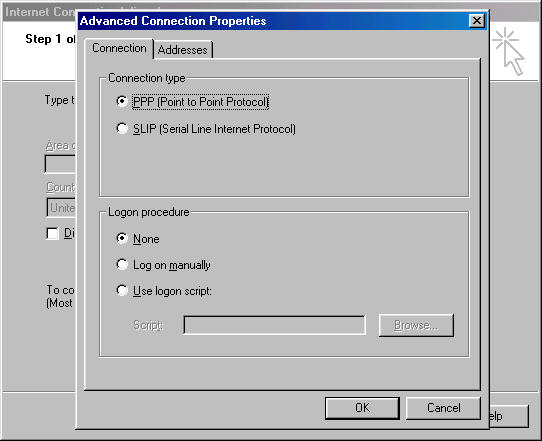
Click on Advanced to see the Advanced Connection Properties. Nothing on the Connection Tab needs to be changed. The default settings of PPP and None are correct.
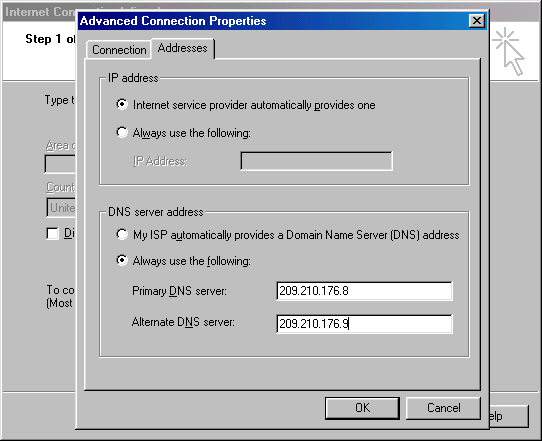
Click the Addresses Tab. The IP address should be left as Internet service provider automatically provides one.
Under the DNS server address at the bottom, select
the option for "Always use the
following."
After clicking OK, you will be returned to the phone number screen. Click Next to continue.
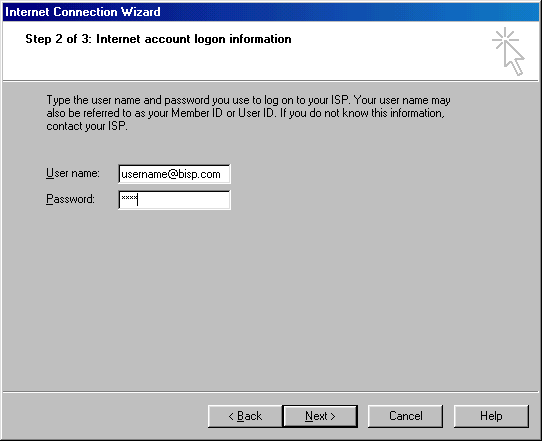
Put in your username and password that you've already registered with your ISP. Be sure to add @ispname.com (or .net) to the end of the username. Passwords are cASe SenSiTiVE so be careful and make sure that your Caps Lock key isn't activated. Click Next.
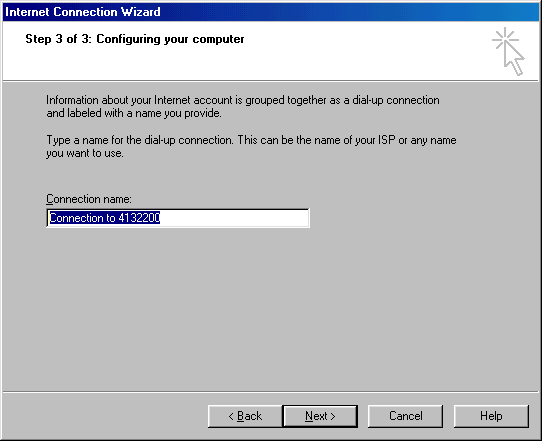
You can leave Connection name as it is, or change it to something more descriptive, such as your ISP's name. You have now successfully set up a Dial-Up Networking Connection. Click Next to set up your email.
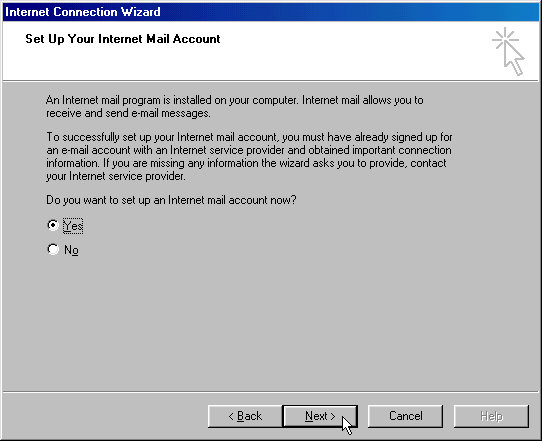
Click Yes to set up your email account and click Next. If you prefer to not set it up now, click No.
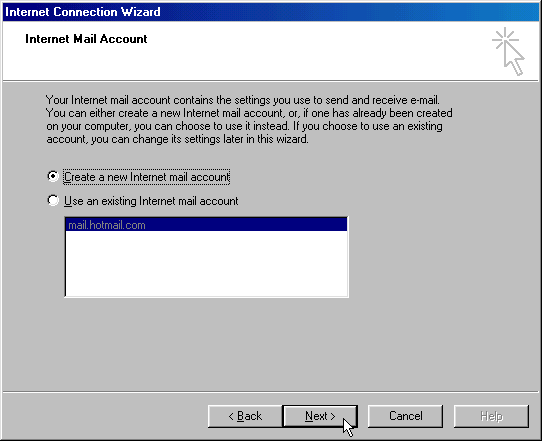
Choose the first option, Create a new Internet mail account, and click Next. Note: If there are no existing email accounts in Outlook Express, INetWiz skips this screen.
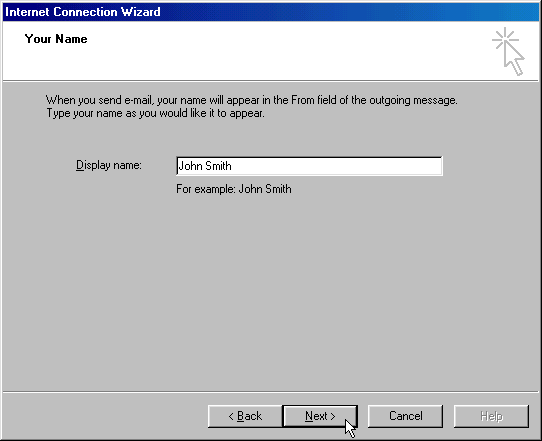
The Display Name is your real name (i.e. John Smith, Smith Family, Smith Roofing INC., etc.). Click Next.
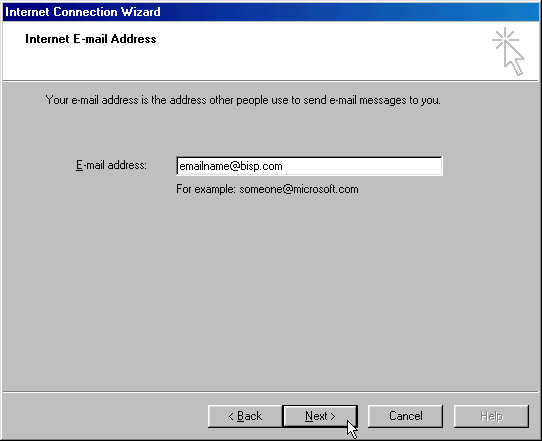
Enter the full E-Mail address and click Next.
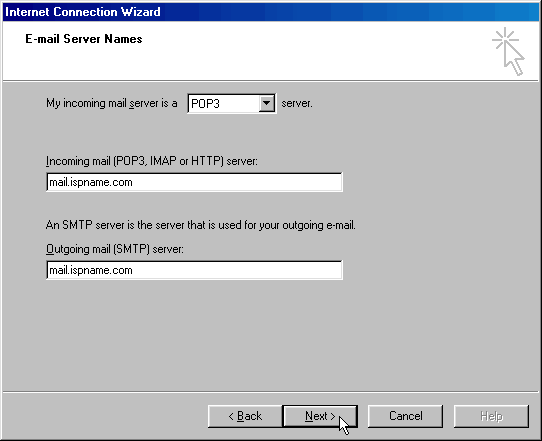
The incoming mail server address is available from your ISP. The outgoing mail server is available from your ISP. Enter them and click Next. Note: When INetWiz is complete, open Outlook Express to enable SMTP Authentication. Click Here for help.
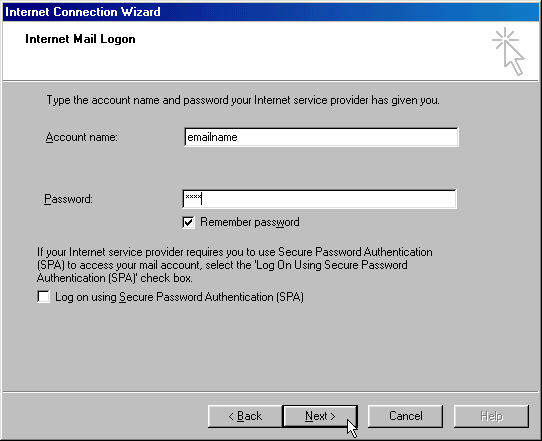
Enter the email Password. You can select Remember Password if you like.
The Account name should already be entered. Do NOT add
@ispname.com
to the end of this.
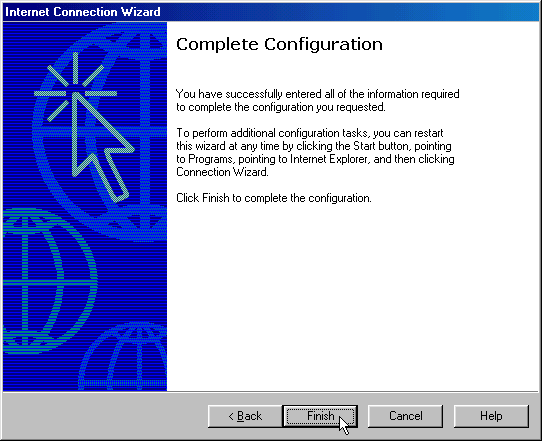
Click Finish to complete the Internet Connection Wizard. You still are not done! Click here for instructions on enabling SMTP Authentication for your email client.
Last Update: Thursday, July 03, 2003 |
