|
|

|
|
|
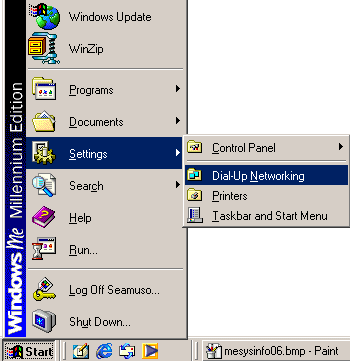
Windows ME Special: How To Change Your Dial-Up Number, Password, Username & Domain Tail This website will show you how to change your most common Internet connection settings. This is actually a fairly easy and fast process. There is only one thing to keep in mind. If you are using Internet Explorer 5.X to automatically connect to the Internet then you will want configure that program separately for the domain tail, username and password. You still follow the instructions below for changing the dial-up number. Netscape, Outlook & Outlook Express' automatic connection options are still setup with the instructions on this page so you won't need to change those programs. If you are using automatic Internet Explorer connections then you still need to follow the instructions below in addition to using the separate Internet Explorer instructions for setting your username, password & domain tail. <Internet Explorer Instructions> No matter which of these changes are needed, you will still start the process with these initial steps. Begin by going into your dial-up networking folder. There are several ways to get into your dial-up networking component of Windows ME. The easiest is pictured below. Just click the "start" button in the lower left corner of your screen. Put your pointer over the "settings" option and a window will pop-up to the right. Click on the dial-up networking option.
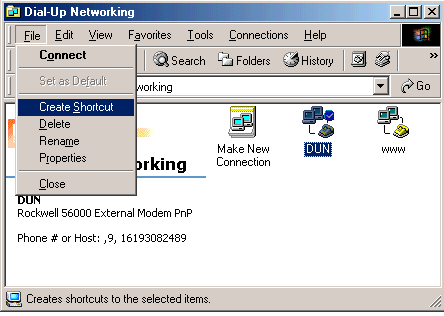
The dial-up networking window will look something like this. Click to highlight your internet connection with us then click the "File" menu at the top and choose the "Properties" option. You can also right-click on the connection to get into your connection properties.
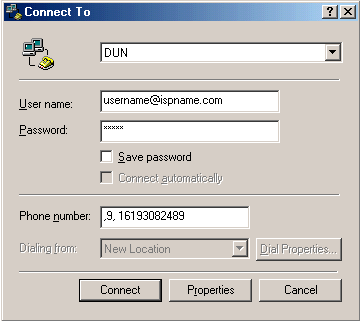
If you see the following window then you used your left mouse button. Don't worry. Click the "Properties" button in that window to get to where we need to go. You just need to know that switching your dial-up number, username and password in this section isn't enough. You need to go to the following properties window by clicking the "Properties" button.
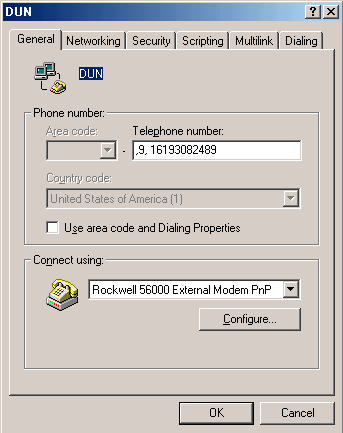
This is where you set your dial-up number to connect to our ISP. Avoid using the "use area code and dialing properties" option because this stuff tends to be unpredictable. Just force the number the way that you want to dial it into the phone number box. For example, include the area code if you live in an area that requires you to dial the area code for local calls. (10-digit dialing areas) Put a 9, (including the comma) in front of the number if you need to dial a 9 to get an outside line. (hotels & workplaces often require the 9) You can even put a *70, (including the comma) to disable call waiting so that you don't get bumped offline every time that you receive a call. Just remember that secondary phone lines usually don't have call waiting even if the primary phone line to your house does have call waiting. Don't hit the "OK" button. We still need to set your username, password and domain tail. Click the "Security" tab at the top of the window to continue.
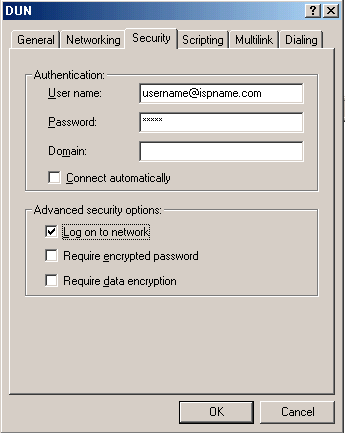
Put in your username (including @ispname.com where ispname is the name of your ISP). Put in your password. Leave the domain blank. Put a checkmark in the "connect automatically" box for your convenience. Add a checkmark for "log on to network" for more reliable connections. Do NOT put in a checkmark for the encryption options. That will definitely prevent you from connecting to your ISP.
Click "OK" and you are ready to connect to the Internet. |
