|
|

|
|
|
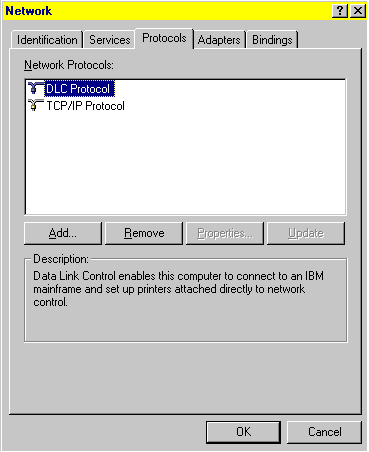
NT TCP/IP Check & Installation Page You must be logged onto the NT4 box with administrator privileges in order to install TCP/IP. Open his Control Panel and then the Network icon. Click on the Protocols tab to see this screen:
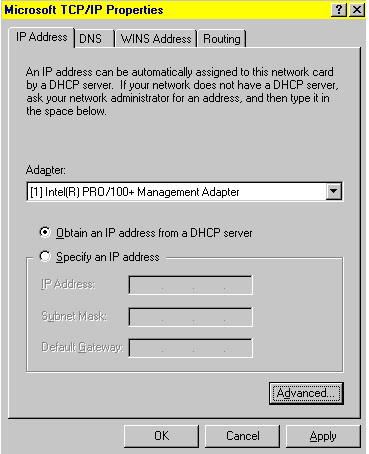
Click the "add" button to install TCP/IP. NOTE: The TCP/IP properties options only relate to LAN settings which are irrelevant to a modem connection. You setup your DNS numbers, etc., in the "phonebook" or dial-up networking properties settings. We are including the following screen shots to the LAN TCP/IP properties just in case you need them. Double-click the TCP/IP Protocol icon to get to its LAN properties page. You can also highlight that icon and click the "properties" button to get to the following screens:
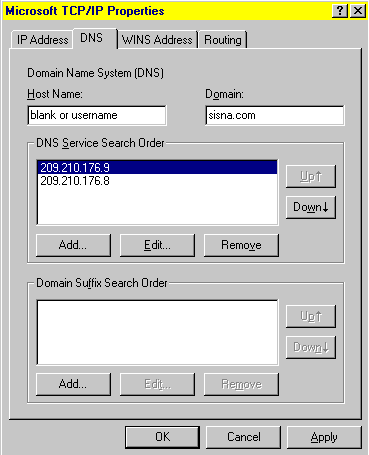
The screen above is the IP Address tab. Once again, it isn't relevant to an internet connection. It only effects local area networks such as the kind that you find in corporate environments. Contact your workplace system administrator for help configuring your box to communicate with that kind of network. Click the DNS tab to get to the following screen:
You would generally want to leave these boxes blank or set to their LAN settings. You would set the DNS info in the "phonebook" properties of their dial-up networking. These settings (in the window above) relate to network adapter cards and not to internet modem connections. If you are using your network card to connect to us via your LAN then you would set the DNS numbers here. Ignore the WINS tab for our purposes. Ignore the Routing tab since it doesn't relate to our WAN internet connection. Apply your changes and "OK" your way out. |


