|
|

|
|
|
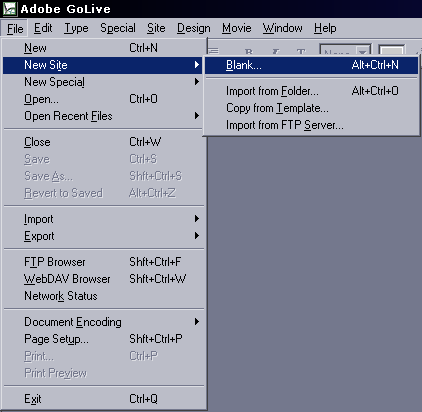
This website will show you the basics for creating a website with Adobe GoLive 5. It will then show you how to use FTP (File Transfer Protocol) to upload your web material to the Internet. Click here if you would like to skip straight to the FTP section. How To Create A Basic Website With Adobe Go Live 5 Begin by opening Adobe GoLive and then clicking the File menu as shown below. Put your pointer over the New Site option and a little window will pop out to the right. Choose the Blank option to create a blank website.
This will cause the following image to pop-up. We suggest naming the "site" (actually an individual web page) with an intuitive name so that you can easily identify it. You are going to put this material into a folder on your own computer. You can click in the little box to the left of "Create Folder" to add a checkmark telling your computer to create a new folder for you. You can also click the Browse button to find a folder that already exists. Hit the OK button when you are finished with this part of the process.
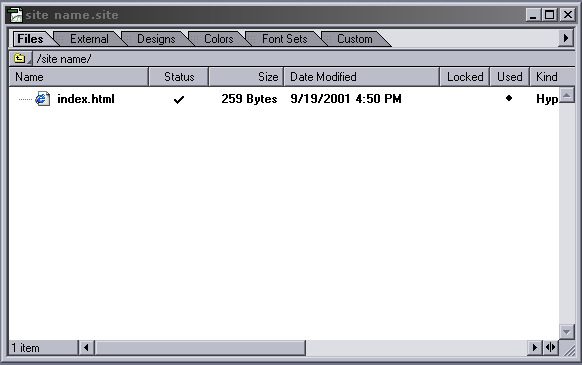
The site name in our example below is index.html but you can use a different name. Be sure to include an "extension" such as .html to the end so that web browsers like Internet Explorer will recognize the material as being a web page. If you're not an expert on this subject then use .html on the end to play it safe.
You can now edit the page by adding pictures, hyperlinks, text, etc. When you are finished, save the page and proceed to the next section to "ftp" the material to our main web server so that it will be visible to everyone on the Internet.
How To FTP Your Website Material To Your ISP For Viewing On The Internet This section will show you how to upload websites created with Adobe GoLive 5 to your personal website on the Internet. Begin by starting the GoLive program. When it is open, click the File menu at the top and choose the FTP Browser option. You can also get a little fancy and press the shift, control and "F" keys all at once to do the same thing.
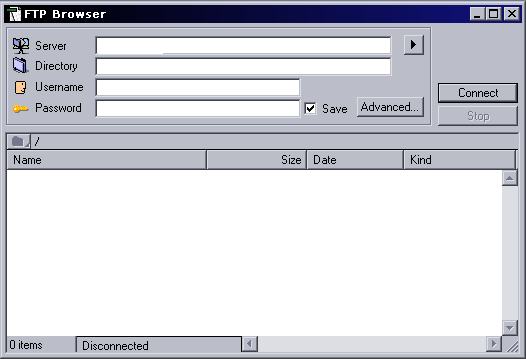
You will see the following window pop-up.
The top four boxes are important. Let's begin with
the Server box. Don't put a "www" or "ftp://" or "http://" in that box.
Just put the server address such as users.ispname.com or even the server's IP address. Your login is your standard ISP username & password. Leave the directory blank. If you don't know the settings then contact your ISP. Click in the little box to the left of "Save" to add a checkmark if you want your Go Live program to remember your password in the future. You can ignore the Advanced button. Click the Connect button when you are ready but make sure that you are actually connected to your ISP first. Just connect the way that you do to get e-mail or go web surfing then come back to the GoLive program and click the connect button.
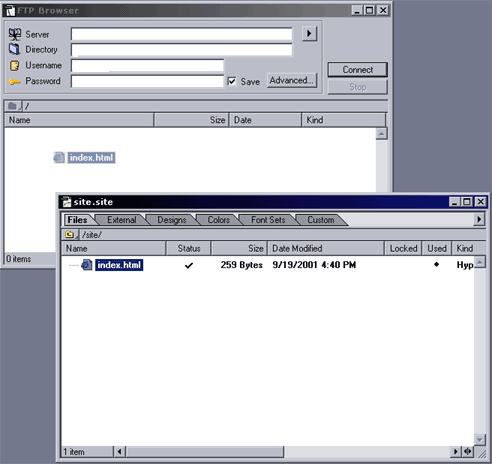
Once you've connected to your ISP, open your website window so that it is next to your FTP Browser window. You do this by clicking the File menu and choosing the Open option or the Open Recent Files option. It will look something like the following picture. In the example below, the site window has only one file called index.html. Drag & drop the file into the FTP Browser window and the file will "upload" to your web folder on the Internet. Drag all of the files and pictures to the FTP Browser window and wait for the transmission to finish. Once that is done, use a web browser such as Netscape or Internet Explorer to view the website from the Internet.
That is the basics. For intermediate and advanced website design information, we suggest searching the Internet or the computer section of your local bookstore. There are lots of good educational resources covering all aspects of web design and programming.
|


