|
|

|
|
|
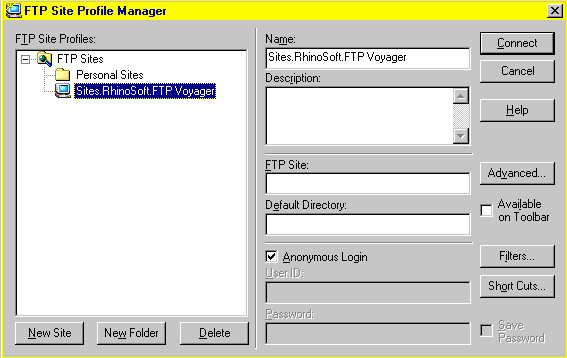
Quick Links: | Profile Setup | Connecting | Transferring Files | Disconnecting | FTP Voyager 7 is a popular ftp utility for transferring big files. A free shareware version is available at www.tucows.com and www.download.com. Setting Up An FTP Profile: The following "site profile manager" screen will usually open up automatically when you start FTP Voyager. <next>
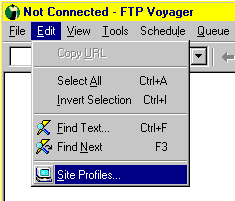
If not, you can open the site profile manager by clicking the edit menu and choosing "site profiles" as shown below. <next>
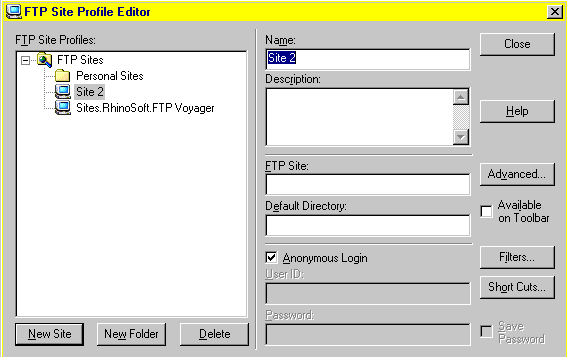
The FTP Site
Profile Editor is where you put your key connection settings.
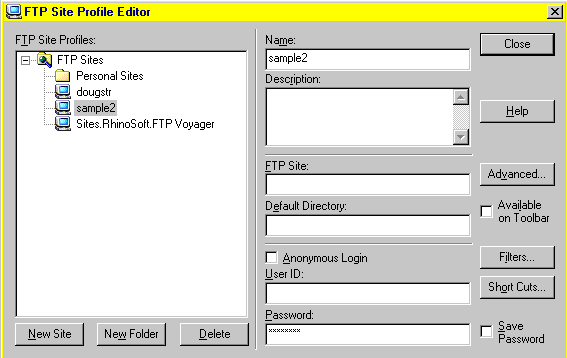
The FTP Site address is users.ispname.com with your ISP's name in there. Leave the Default Directory box blank. You will be asked to logon when you try to connect. This will take you to your personal web directory where you put your website material. The login is your regular dial-up login like you use to connect to the Internet. The format is username@ispname.com with your regular password. You will need to remove the checkmark for anonymous login to upload files to your ftp directory. Once that checkmark is removed, put in your username and password. <next>
The following window shows a typical ftp profile setup. <next>
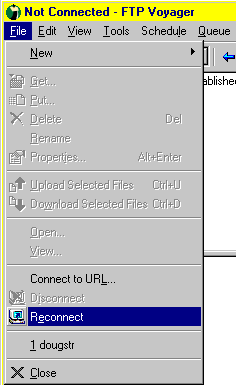
Connecting To The FTP Server: Once you have a profile setup, you have several options for connecting to your ftp directory. You can click the file menu and choose reconnect (or your username if you've used that profile before) as shown below. <next>
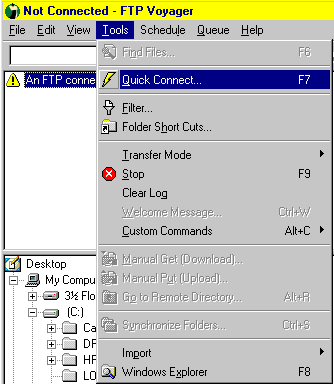
You can also use the tools menu to choose "quick connect" as shown below. <next>
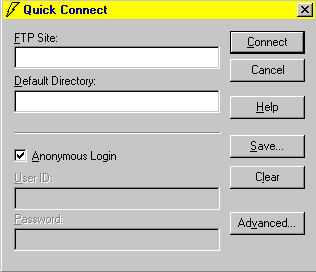
The "quick connect" window is shown below. Once again, the FTP Site address is users.ispname.com with your ISP's name in there. The Default Directory needs to be blank when you first set this up. Remove the checkmark for "anonymous login" and put in your username and password. Connect to the Internet (if you're not already connected) then cllick the connect button and you will logon to your ftp directory. Before we connect, let's take a look at the "save" button option. <next>
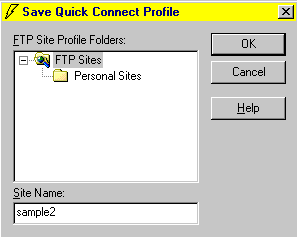
Clicking the "save" button will produce the window below. Highlight "ftp sites" or "personal sites" to choose where to save the profile. Put the profile name in the site name box. It is best to name your site after your username so that it will be easy to identify. Click OK when finished. <next>
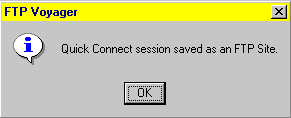
You will receive a confirmation that the quick connection profile has been saved as shown below. Click OK. <next>
This will return you to the quick connect window. Make sure that you have removed the checkmark for anonymous login (unlike the picture below) and plug-in your username and password. Click the connect button and you should be able to logon to your ftp directory. <next>
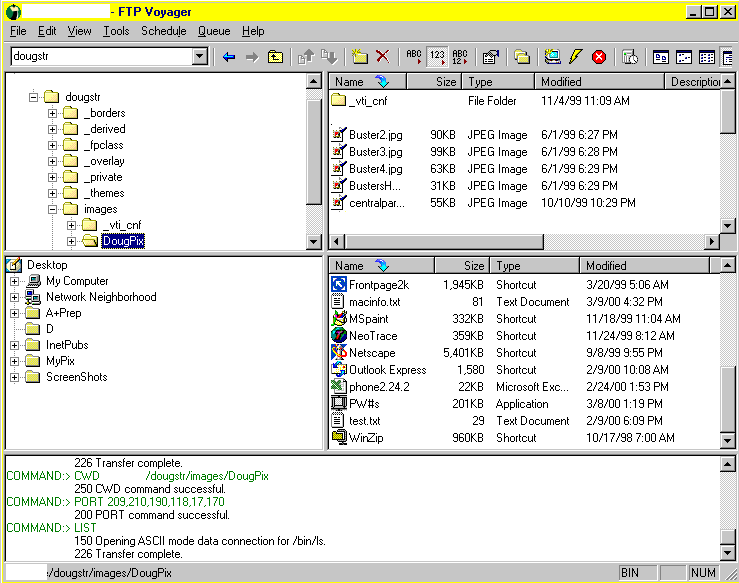
Transferring Files & Folders: The main FTP Voyager window is pictured below. The top left window shows the contents of the ftp folder that is located on my ISP's Web server. I've highlighted a sub-folder called DougPix. The window in the top right corner shows the contents of the DougPix folder. The bottom left pane shows my desktop since I've highlighted it. You could also open My Computer to see the C: drive, etc. The bottom right pane shows the contents of my desktop since that was what I selected in the bottom left pane. You move single files or entire directories by dragging & dropping the contents from one of the right panes to the other right pane. For example, I could drag & drop Buster2.jpg (a picture of my dog) from the top right pane to the bottom right pane to move it from the ftp server to my computer's desktop. Conversely, I could drag & drop a notepad text file called test.txt from the bottom right pane to the top right pane to transfer that file from my computer at work to my ftp folder on my ISP's ftp server. It's easy and fast. <next: disconnecting>
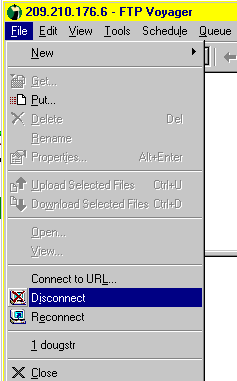
Disconnecting From The FTP Server: Once you've transferred or downloaded your files, you disconnect by clicking the file menu and choosing disconnect as shown below.
<return to top> <return to windows home page> |
