|
|

|
|
|
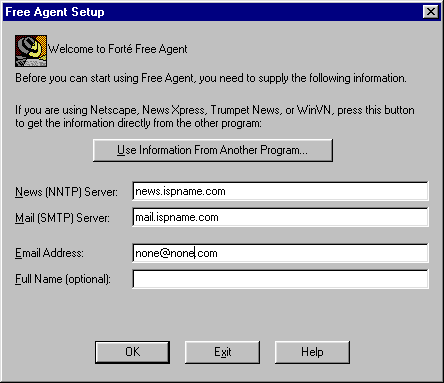
Quick Links: Setup Free Agent | Verifying Existing Settings | Downloading Groups | Downloading Messages | Posting Replies | Forte's Free Agent is one of the most popular Newsgroup programs on the Internet. This tutorial will focus on setting up Free Agent for use with your Internet connection. How To Setup Free Agent:After installing Free Agent for the first time, you will be prompted to enter certain information. In the first screen that appears, the name of your News (NNTP) Server will always follow this format: news.ispname.com [or .net] Of course, you will replace 'ispname' with the name of your ISP. The mail server address is generally mail.ispname.com [or .net]. Note: You might want to use a bogus e-mail address as a precaution. Spammers routinely get your e-mail address from Newsgroups without your knowledge. Using your real e-mail address in your news account properties will probably cause you to start getting a lot of unwanted e-mail.
Click OK to complete the setup. You will be prompted to go online as shown in the screen below.
Click No so that you can enable NNTP authentication before connecting to the Newsgroup Server. We need to setup something called "NNTP authentication" first. The next section will show you how to do that in the Users tab of General Preferences.
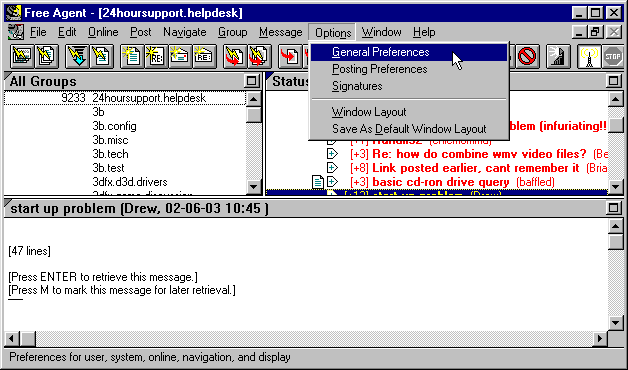
To access the settings for Free Agent, click on the Options menu at the top and select General Preferences from the menu.
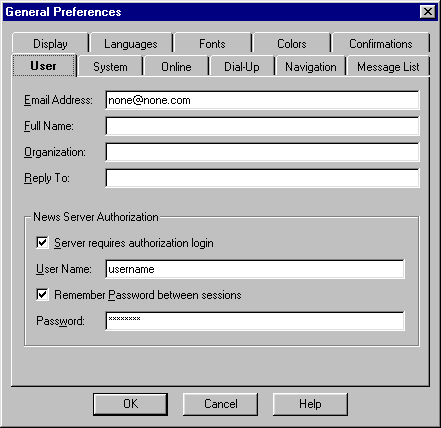
The Email Address field must have an email address in order to post messages to a Newsgroup. You might want to use a bogus e-mail address as a precaution to spam (unsolicited email). Spammers routinely get your e-mail address from Newsgroups without your knowledge. Using your real e-mail address in your news account properties will probably cause you to start getting a lot of unwanted e-mail. The three remaining fields at the top are optional. Most people put a nickname or handle rather than their real name in order to avoid making your personal information available to virtually anyone. Important: Place a checkmark in the option that says "Server requires authentication login" and enter your username in the User name field. This is the same username you use to dial up to the Internet except that you won't include an @ispname.com domain tail on the end. Just put the user name part. . Place a checkmark in Remember Password between sessions and enter your password in the Password field if you want to take advantage of this convenient feature. It is optional but recommended.
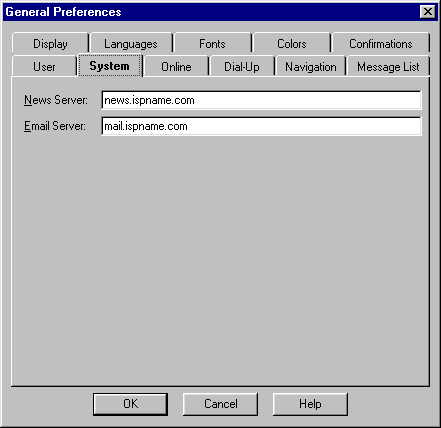
System tab: The name of your News (NNTP) Server will always follow this
format: news.ispname.com [.net]
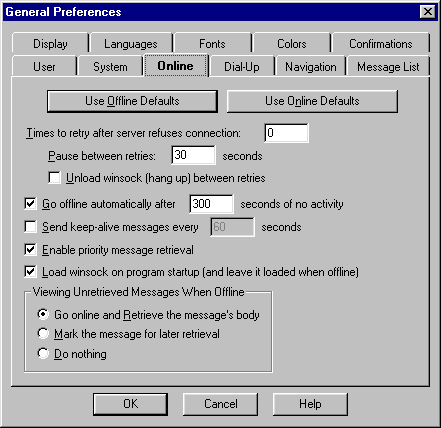
Online tab: The Online tab determines when and how Free Agent maintains its connection to the News Server. This has nothing to do with your dial-up connection. Free Agent is "online" when it is connected to the News server. This can affect some of the settings on the Dial-Up tab which controls whether Free Agent dials up when trying to go "online".
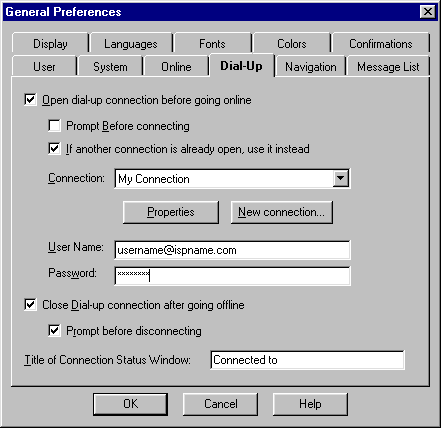
Dial-Up tab: If you prefer to connect to the Internet on you own before opening Free Agent, don't bother with this tab. You can make Free Agent dial up to the Internet when you first launch the program. Select your ISP's connection from the Connection drop-down menu. Enter your username (including '@ispname.com' on the end) and password for your ISP here as well.
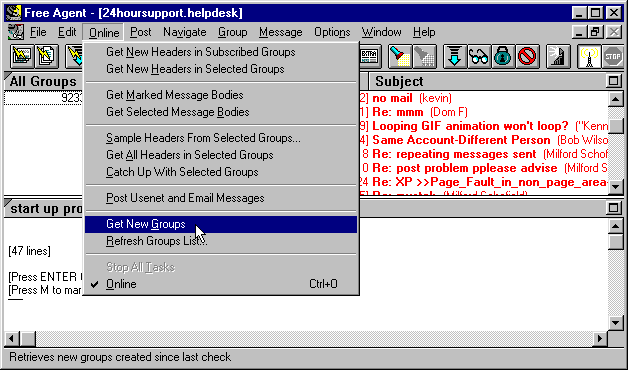
The remainder of the tabs deal with personal preferences unrelated to a dial-up connection. They are simply options to be used at your choosing. If this is your first time using Free Agent, there will not be any newsgroups listed in the Groups Pane (left). Click the Online menu and then click Get New Groups. If you already have news groups listed, you can simply click Refresh Groups List.
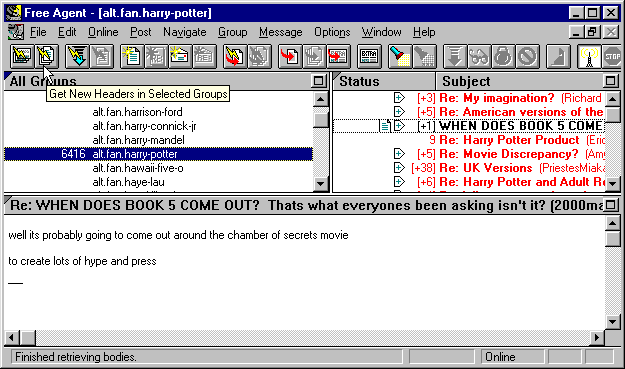
Downloading & Viewing Messages: In the Groups Pane (left), select the newsgroup where you want to view messages. Once it is highlighted, click on the second button on the toolbar as shown below. New messages will be downloaded and displayed in the Message List Pane (right). This may take a while if there are a lot of messages. Double-click a message header on the right and the message will be displayed in the Message Pane (bottom).
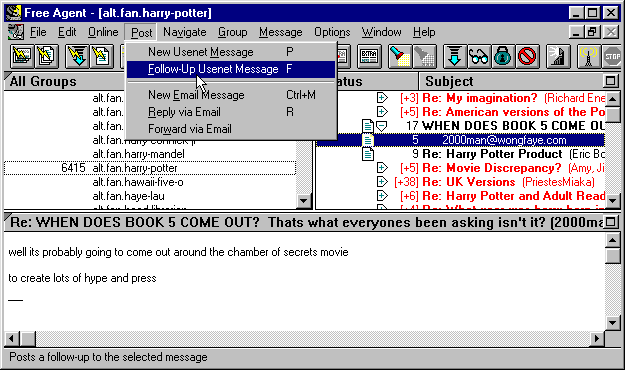
To post a reply to a message, click to highlight the message in the Message List Pane (right). Next, click the Post menu and select Follow-Up Usenet Message.
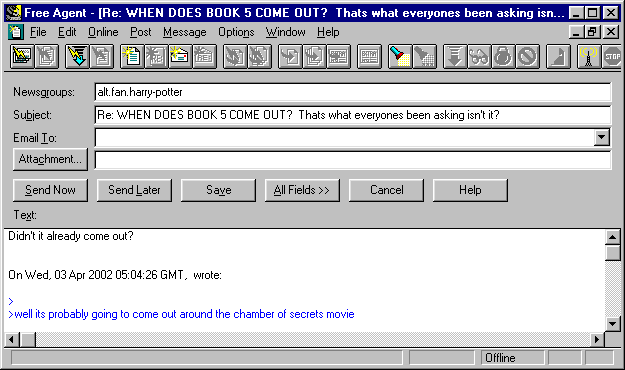
The following screen appears. Simply type your reply and click Send Now.
Last Update: Thursday, July 03, 2003 |
