|
|

|
|
|
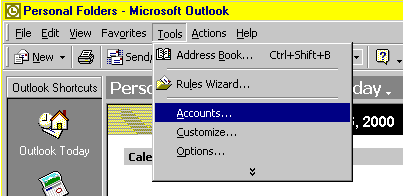
This page teaches you to change your e-mail account information so that Outlook 2000 knows where to go to send and receive e-mails through your ISP. It also covers a few "tweaks" for customizing the program to suit your needs. Note: You will also need for your ISP to be setup on its end to recognize your e-mail account. If you don't already have an e-mail account assigned by them then do that first. Be sure to tell them that you need the "mail server" address such as mail.ispname.com. If you already have an e-mail account and you want to change the name or password then you will need your ISP to do this on their end. Afterwards, you need to follow this tutorial to change the name or password in your own settings on your own computer. Let's get started setting up Outlook 2000 on your computer. If you've just setup a new e-mail configuration then you are already in the internet accounts section. If not, click the "tools" menu and choose "accounts" to get there. If you don't have an "Accounts" option then choose the "Services" option for the same instructions. <next>
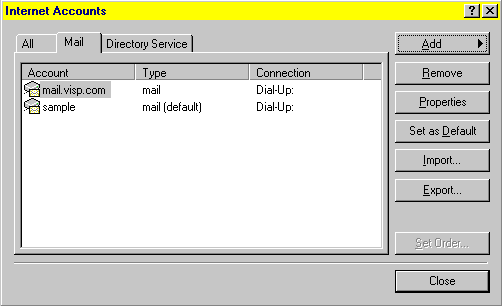
Click the "mail" tab. Newly created e-mails will be named after their mail server. In such cases, highlight that account and hit the "properties" button to change that name to match the e-mail name. You also need to highlight problem accounts and choose "properties" to check their settings if troubleshooting an e-mail problem. <next>
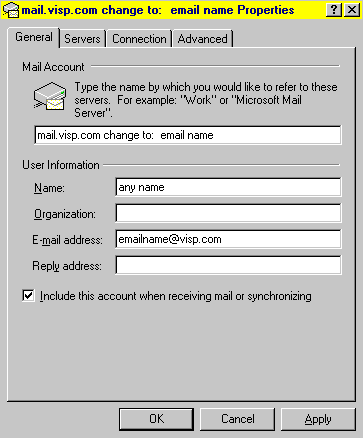
The properties of each e-mail account are covered by four tabs as shown below. Beginning with the "general" tab, change the top box to the e-mail name for that account. The "name" box is what people will see as the sender when receiving e-mail from this account. The e-mail address also needs to be checked. Make sure that you don't have any empty spaces in the address. Make sure that don't spell "@" with "at" because that will definitely cause problems. <next>
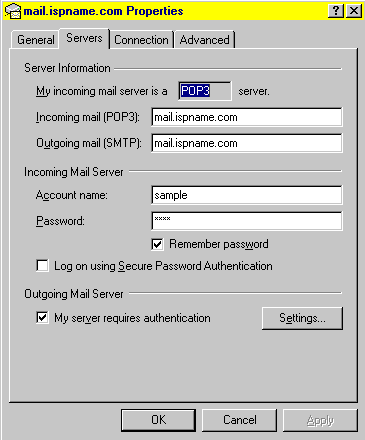
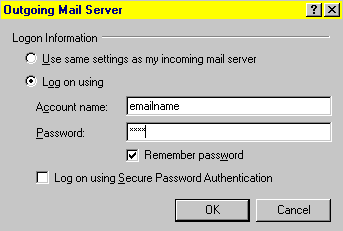
Check the "servers" tab to make sure that you are set for a POP3 connection with the correct mail server addresses which will probably be something like mail.ispname.com. However, some ISPs use smtp.ispname.com for the outgoing address. Note: That address can be the mail server IP address such as 209.210.176.99 <fake address>. Please contact your ISP for the mail server addresses if you've lost them. Make sure that you are not trying to use Secure Password Authentication. That will definitely cause problems unless you are running a virtual domain mail server that is specifically setup for a secure (extra cost) encrypted connection. Also, it is very important that you have a checkmark in the box where it says "My server requires authentication." Click the box to add the checkmark if needed then click the "Settings" button.
You need to click in the circle to select "Log on using" and then enter your e-mail name (not the full address) and password. Click OK when finished.
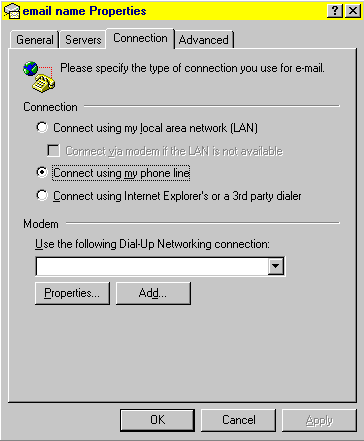
The connection tab is where you set Outlook 2000 to use our VISP connection through a phone line. You can actually add a new DUN connection with the "add" button. You can also link directly to the DUN properties through the properties button. <next>
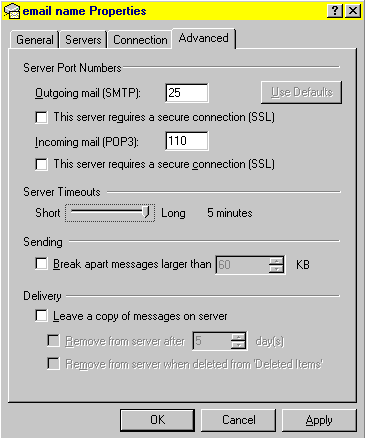
The advanced tab is important. Always remember to increase the "server timeouts" to a maximum of five minutes. Outlook could still "timeout" if you try to download super large messages (or attachments) or excessive numbers of new e-mails. Don't change the default port numbers. Don't put a checkmark in the SSL options (unless you are paying extra for an SSL connection for a virtual domain mail server). We strongly discourage you from leaving a copy of messages on your ISP's mail servers. This can cause three problems: (1) mail accounts usually only have 10 MB of space; (2) full mail directories cause make it take much longer to check your e-mails; and (3) Outlook may mistakenly report that there are no new messages if it sees old messages that have already been checked. <next>
That covers the configuration and troubleshooting of Outlook 2000. You can see additional Outlook options by going to the Tools -> Options section or you can return to the windows page. <top>
|
