|
|

|
|
|
Quick Links: | New Account Setup | Configuring & Troubleshooting Accounts | Options | Services Variation | Outlook 2000 is very similar to Outlook Express for our purposes. Almost everything is configured from the Tools menu -> Accounts option. You can also do some configuration in the Tools -> Options section although you can ignore that section altogether. This tutorial involves the setup for a regular internet connection. If you are connecting from a workplace environment through a corporate network rather than using a modem and a phone line then the configuration can be quite different. You may need your network's system administrator to help you configure Outlook for that connection. This page covers the setup of a brand new Outlook 2000 account. There are two related pages: (1) Configuration & Troubleshooting Of Existing Accounts and (2) Additional Options. Click on one of those topics to see those separate pages. Note: You will also need for your ISP to be setup on its end to recognize your new e-mail account. If you don't already have an e-mail account assigned by them then do that first. Be sure to tell them that you need the "mail server" address such as mail.ispname.com. If you already have an e-mail account and you want to change the name or password then you will need your ISP to do this on their end. Afterwards, you need to go to the configuration page to change the name or password in your own settings on your own computer.
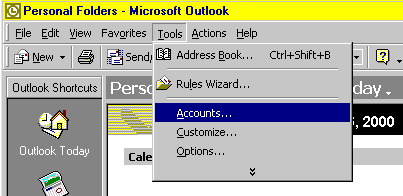
New Account Setup: Open Outlook 2000 and click the Tools menu to choose the "Accounts" option as shown below. Note: Some versions of Outlook 2000 have this listed as "Services" rather than "Accounts." Choose whichever one you find and the setup will be the same. <next>
Click the "add" button and choose the "mail" option as shown below. <next>
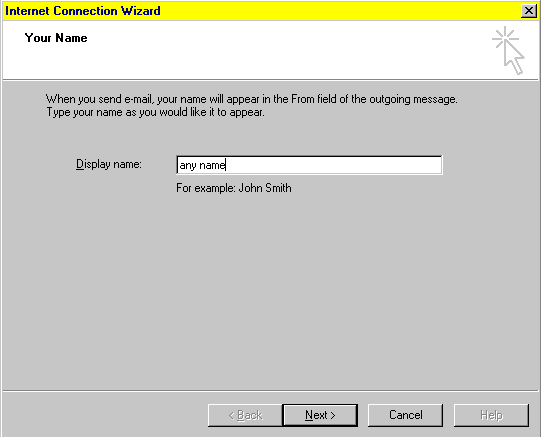
The e-mail setup wizard is very similar to the version included with Outlook Express. However, there are some differences. Begin by putting in the "display name." That is the name that people will see when they receive an e-mail from this account. It does not have to match the e-mail username. <next>
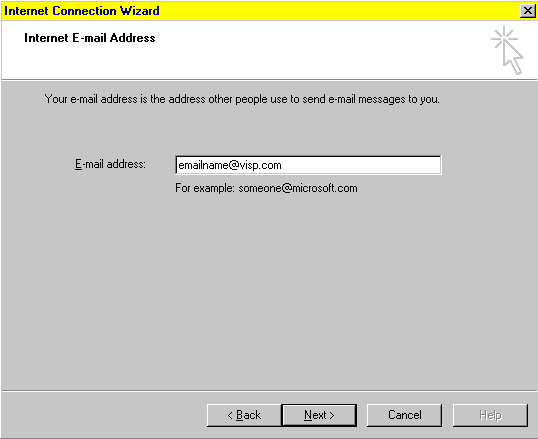
Put in the e-mail address. Make sure that you don't include any empty spaces or spell "at" instead of "@" because that will not work. <next>
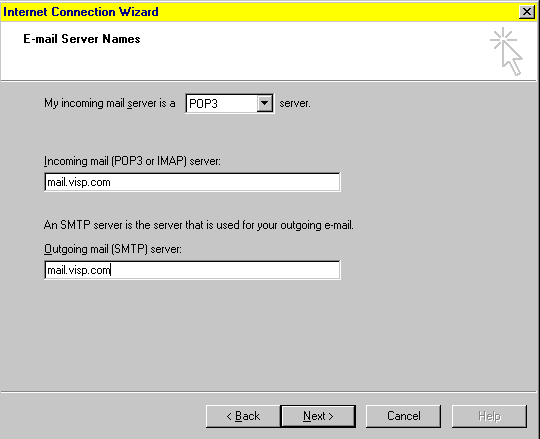
The incoming mail server is always a POP3 server. The mail server address will usually be something like mail.ispname.com but you can also use a mail server's IP address which will look something like 209.210.176.99. The outgoing mail server address will usually be the same but some ISPs use smtp.ispname.com instead of mail.ispname.com. You can get that info from the tech support group at your ISP but try mail.ispname.com first because it might save you a call. <next>
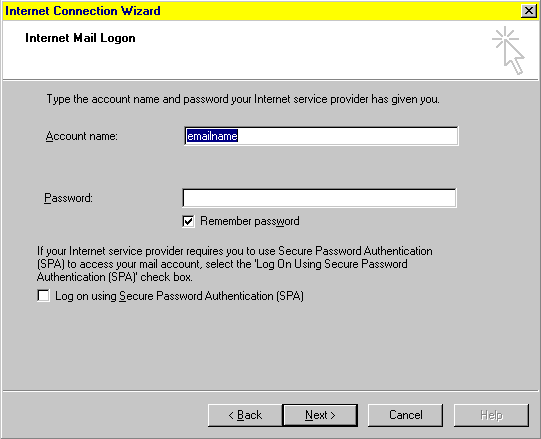
The e-mail account name is not the dial-up username although it can be the same. Leaving the password blank will add privacy at the expense of inconvenience. Don't use Secure Password Authentication! <next>
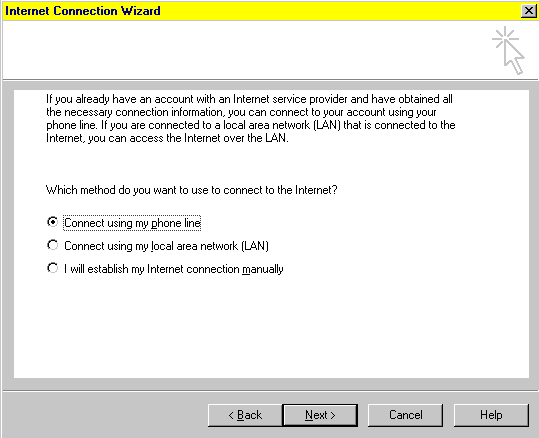
Most people connect through a modem so choose the option to "connect using my phone line" and then click next. Note: you would also choose the phone line option for DSL and ISDN connections. <next>
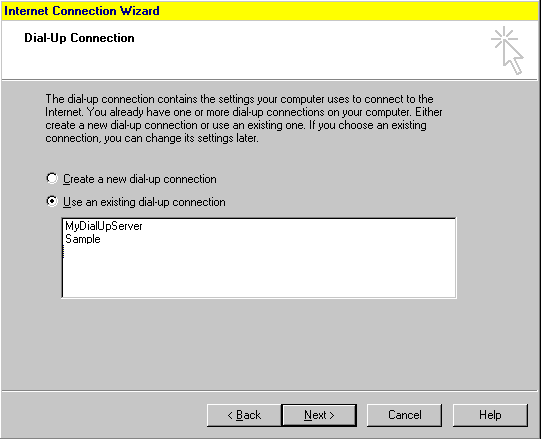
You should already have a dial-up connection setup for your specific ISP. If not, you can create a new one from here. Otherwise, select "use an existing dial-up connection" and highlight the appropriate ISP's connection. <next>
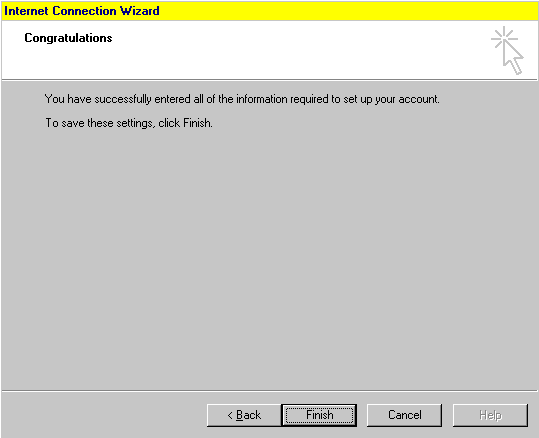
You aren't quite finished, yet. Newly setup accounts still need some configuration. Continue with the next section to cover that material.
<return to top> <basic outlook setup page> <additional outlook options> <windows home>
|
