|
|

|
|
|
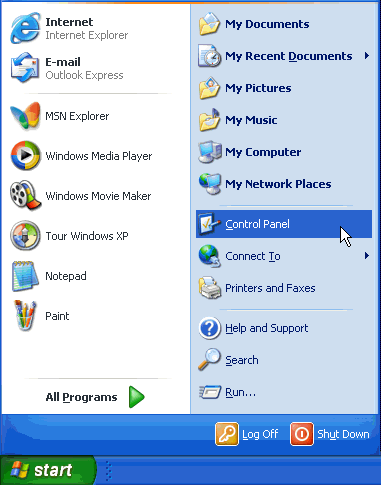
Windows XP Dial-Up Modem & Control Panel Configurations Quick Links: Connection Wizard | Existing Connection | LAN/Broadband | System Restore | Links on this page: General Tab | Modem Tab | Diagnostic Tab | Advanced Tab | Driver Tab | Resources Tab | Power Management Tab | Reinstalling | Modem Control Panel: To update modem driver software or view modem settings, click the Start button and select Control Panel as pictured below.
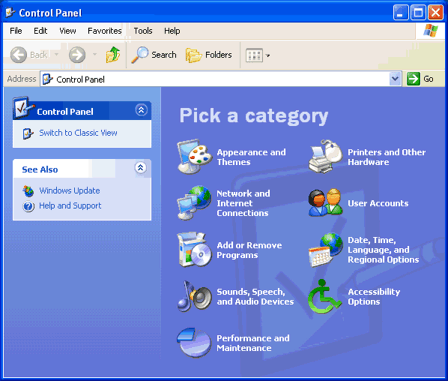
Windows XP gives you the option to view the Control Panel in
"Category View" or "Classic View".
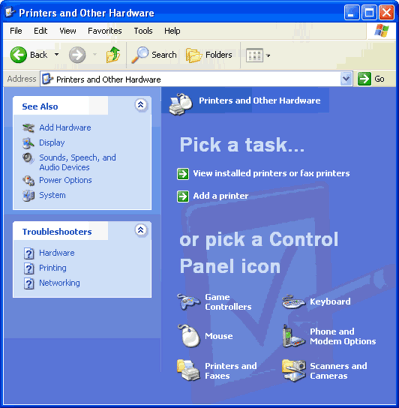
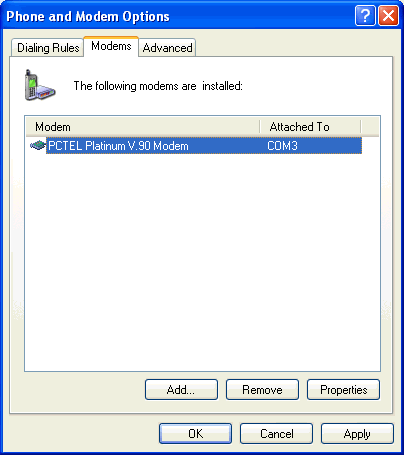
Here you can access the properties for a modem. You can also add or remove modems. Click "Properties" to open the following window. Information on adding a modem is available at the bottom of the page (click here).
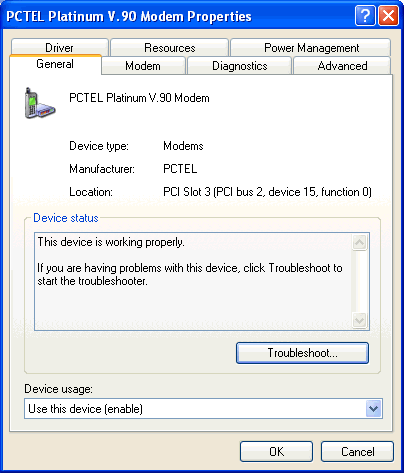
The General tab will be the first tab displayed. The box under Device status should read "This devise is working properly."
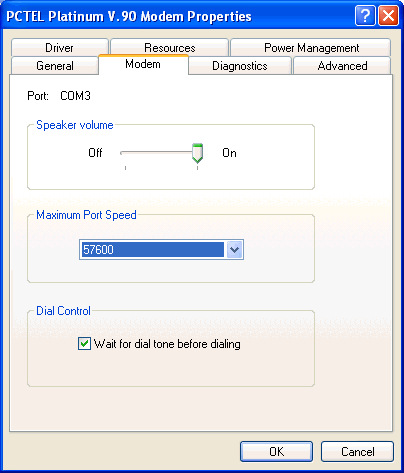
Click on the Modem tab to see the following screen. It is a good idea to set the Maximum Port Speed as close to your modem's actual speed. So, for a 56k modem this would be 57600. Leave the checkmark in "Wait for dial tone before dialing". Otherwise, you may get busy signals or "no dial-tone" errors. Important: Since the DUN properties will override these settings, changes must be done from within the connectoid. Already existing connections will not be affected by changes in the Control Panel.
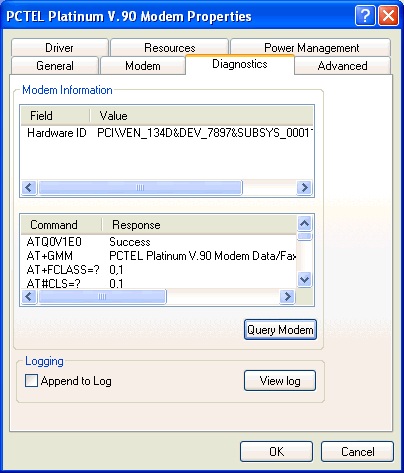
Click the Diagnostics tab across the top to see the screen below. Initially, the "Command/Response" field will be blank. Click the Query Modem button to run a diagnostic. If everything is ok, a list of commands starting with the letters "AT" will be displayed as shown below. If the computer cannot communicate with the modem, an error message will pop up.
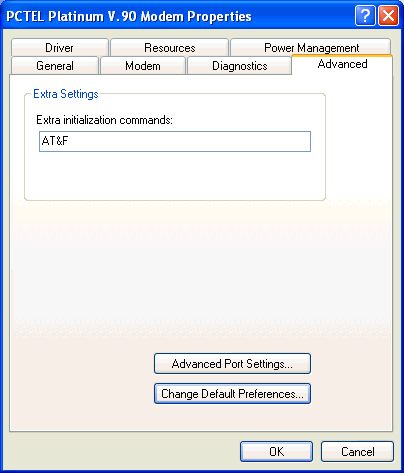
Click on the Advanced tab to see the image below. Here you can add initialization strings to change the operation of your modem. These are typically not required, but can be useful in correcting connection problems. Consult your modem documentation or contact your ISP for help.
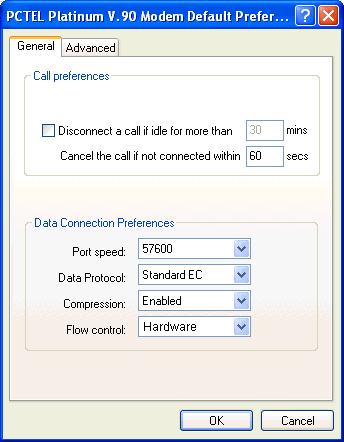
Click on Change Default Preferences to see the screen below.
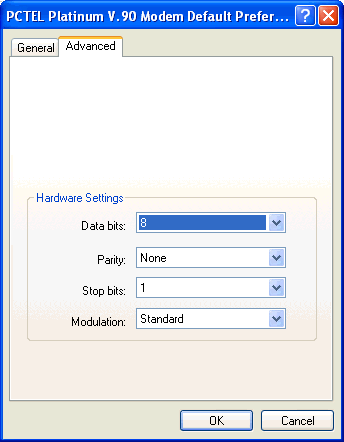
You can change the Call preferences according to your taste. The Data Connection Preferences is where you can set the speed and flow control. It is better to change these settings from within the actual connection. Click here to go to the Existing Connection section for help with this. Click the Advanced tab to see the screen below. The default settings of 8, None, 1, Standard should be left alone.
Click 'OK' to return to the Advanced tab.
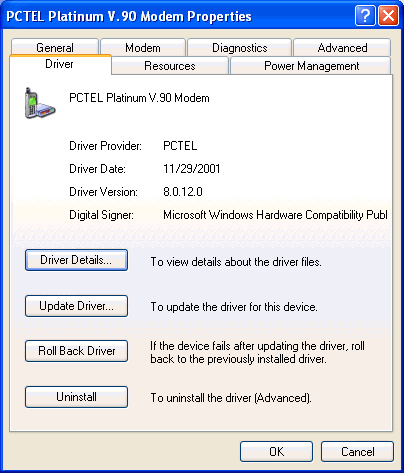
Click the Driver tab of the Modem Properties to see the screen below.
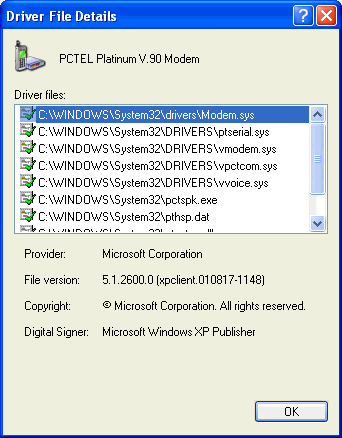
Click on the Driver Details button to view the file version of your driver, as in the picture below.
Click 'OK' to get back to the main Driver tab.
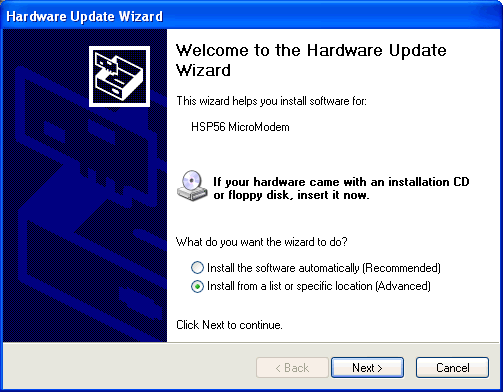
If you experience problems after updating a modem driver, use the Rollback feature to return to the previous driver. If you determine that you need to upgrade your modem driver, click the Update Driver button to start the Update Wizard.
You can choose to have Windows XP locate and install the
software automatically.
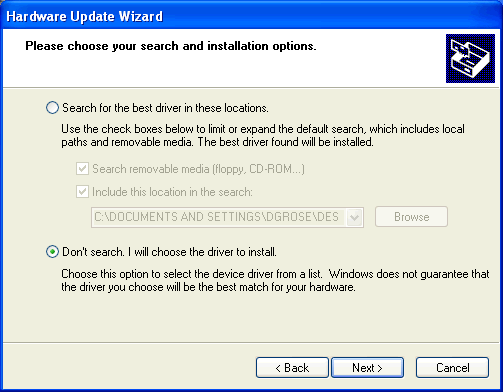
Choose the last option, Don't search. I will choose the driver to install. Then click 'Next'.
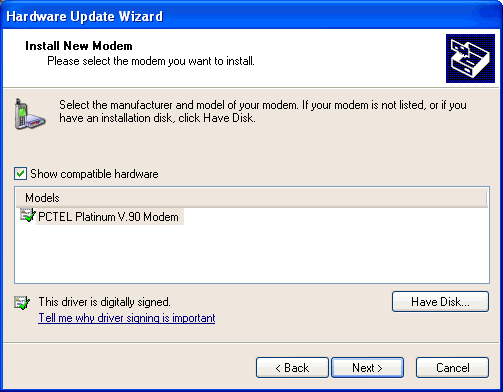
Here you will click on the Have Disk button. Insert the disk or choose the location on your hard drive where you have stored the driver software. Click 'Next' and your modem driver will be updated with the new software.
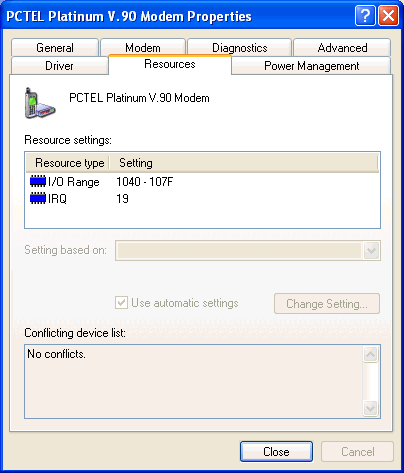
Click the Resources tab to get to the screen below. The important thing to check is that the Conflicting device list shows No conflicts. If there are any conflicts, you may need to reinstall the modem. Contact your computer manufacturer or modem manufacturer for assistance.
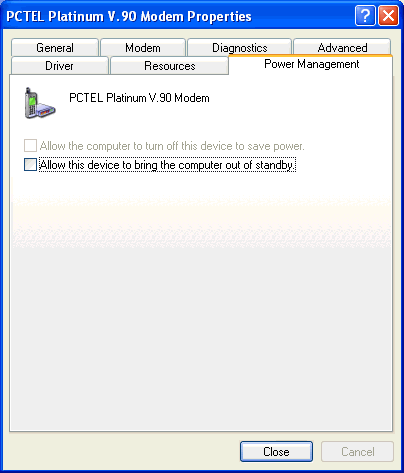
The options on the Power Management tab are self-explanatory and up to your personal preference.
If you're getting a lot of modem errors, such as "cannot open port", "port already in use", "cannot communicate with modem", then you may need to reinstall the modem. You can run a diagnostic to see if the computer can actually communicate with the modem. (Click here for info.) You can also check for device conflicts on the Resources tab. (click here for info.) Follow the instructions at the top of the page to access the Phone and Modem Options dialogue in the Control Panel. (Click here.)
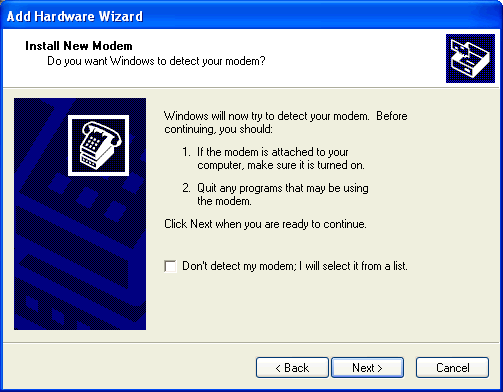
Click Remove, and then reboot your computer. When it restarts, Windows XP should automatically find your modem and try to install the driver. If it doesn't, try rebooting again. You can also go back to the Phone and Modem Options and click Add. Either way, you should eventually reach the screen below.
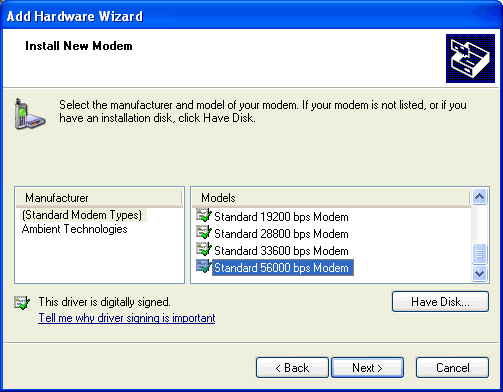
Click 'Next' and Windows XP will locate and install your modem. Or, if you have new modem software (driver) that you prefer to install, choose Don't detect my modem; I will select it from a list. The following screen appears.
Click the Have Disk button. You will be prompted for the location of the file.
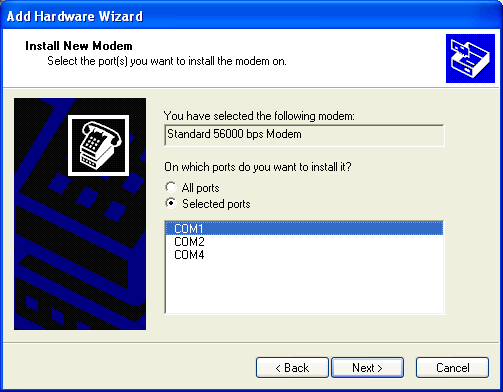
After you have selected the file, choose which port to install the modem on. Any of the COM ports are typically okay to use. Try to pick one that is never used by another device (like a mouse, camera, joystick, etc.).
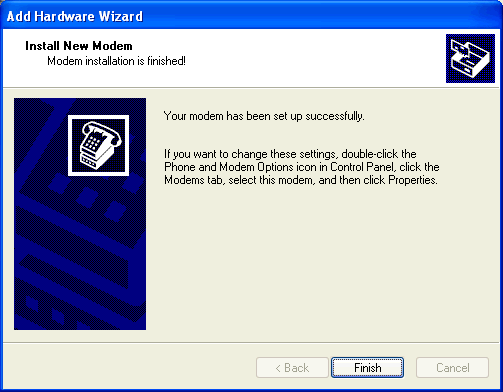
After Windows XP installs the modem, click Finish to exit the Wizard.
<return to top> <windows home page>
Last Update: Thursday, July 03, 2003 |