|
|

|
|
|
Windows XP Dial-Up Modem & Control Panel Configurations Quick Links: Connection Wizard | Control Panel: Phone & Modem | LAN/Broadband | System Restore | Links on this page: General tab | Options tab | Security tab | Networking tab | Advanced tab |
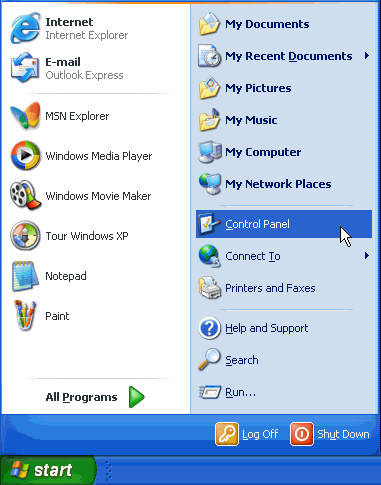
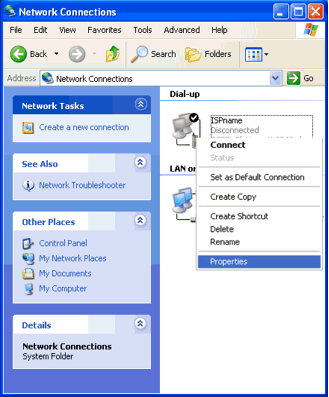
Checking an Existing Connection: To verify the settings of an existing connection, click the Start button and select Control Panel as pictured below.
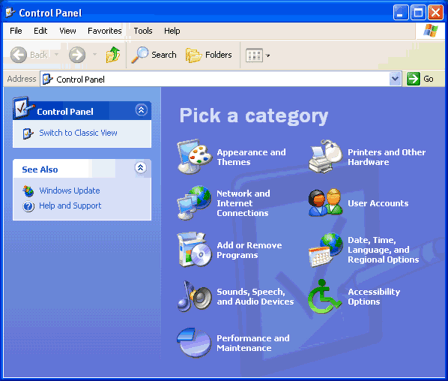
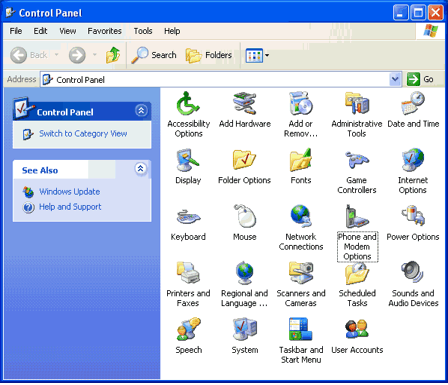
Windows XP gives you the option to view the Control Panel in
"Category View" or "Classic View".
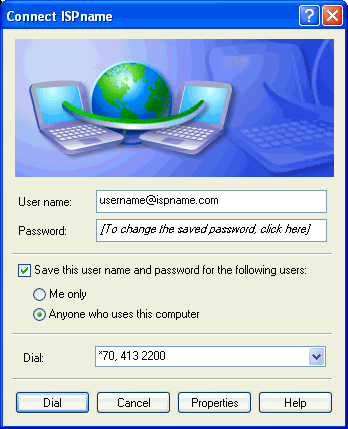
Tip: Delete any old, unused dial-up connections. This ensures your programs will not use old connections. With only one connection listed, Internet Explorer or Netscape will automatically use the right one. Unlike some previous versions of Windows, you can reset your username, password, and phone number in the Connect box below. Be sure to include your ISP's domain tail on the User Name. For example, Santa's username for his ISP northpole.com would look like santa@northpole.com. This is not an e-mail address although you might have a matching e-mail address. Click on the Properties button to continue.
If the Properties option is grayed-out, you are not logged in as an Administrator. You will need to log-off your computer and log back in either as (1) Administrator or (2) any other user account you have set up on your PC with Administrative rights.
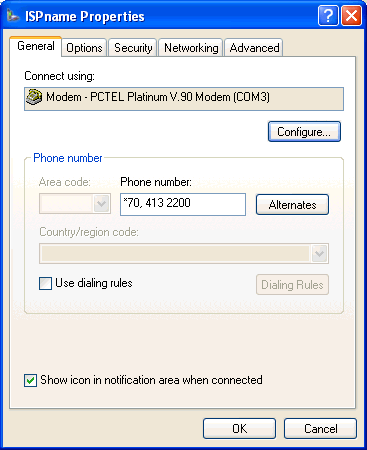
Here you can configure your modem and change the the number your computer dials to your ISP. Enter any necessary numbers in the Phone Number field. This includes 9, *70 and the area code for 10-digit dialing. Make sure the checkmark is taken out of "Use Dialing Rules".
Click the Configure button to open the modem properties seen in the following window.
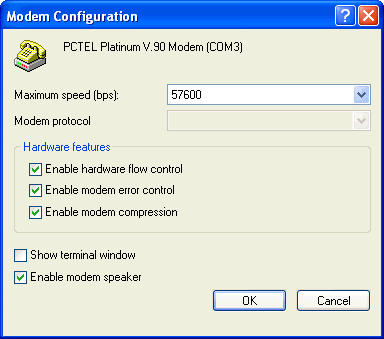
This is where you can set the speed and flow control. There are some things that you need in this window. First of all, click the little drop-down arrow on the far right of the top box to set the maximum speed to match your modem's speed. For example, a 56k modem needs 57600 selected. If you leave it set for 115200 then you won't get a faster connection because a 56k modem just isn't capable of going twice as fast as its speed. You will simply destabilize your modem connection by trying to get it to do something that it can't do. Important: You may be tempted to change these settings in the Phone & Modems section of the Control Panel. Changes made in the Control Panel will not affect existing connections. Changes must be made here in the DUN connectoid to take affect. The flow control option is a bit tricky, since it depends on your modem. The rule of thumb is that most internal modems need Software flow control, while external modems need hardware flow control. However, most new internal modems operate okay with hardware flow control even though they're generally optimized for software flow control. If you find that you keep getting disconnected early in your connection then this is one of the most likely culprits. You may need to experiment with this one. Note: If flow control is disabled, error control and modem compression will automatically be disabled too. If flow control is enabled, you'll also want checkmarks in the error control and modem compression options 99% of the time. If you've got bad modem software then you will rarely need to disable these options. Doing this will actually worsen the performance of your modem connection so save this as a last resort. Modem Compression can only be enabled if Error Control is enabled, which can only be enabled if Flow Control is enabled. The terminal window is strictly optional. We highly recommend that you do have a checkmark for the enable modem speaker option. This will let you hear if you are getting busy signals, operator messages or similar problems when connecting to the Internet. Once this is configured, click OK to return to the previous window under the General tab. <next>
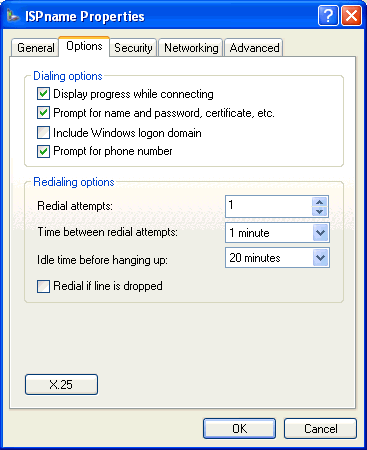
Click the Options tab at the top to get to the screen pictured below. Here you can select connection options and redial options. The Dialing options are optional. We do recommend a checkmark for the first option to display progress. The options to Prompt for name and password and Prompt for phone number translate into "Connect Automatically". If they are not checked, you will never be presented with the "Connect" box. It's a good idea to give some serious thought to the "Idle time before hanging up" option. The default setting is 20 minutes. This means that your computer will automatically disconnect after 20 minutes of inactivity. You can click on the arrow at the right of that option to increase that time or even remove the automatic disconnect setting. Remove the checkmark from the Redial if line is dropped option. This will avoid your computer connecting at odd hours without your knowledge. Don't want to mess with the X.25 options unless you are a computer professional. It's unlikely that your ISP accepts X.25 connections.
<next>
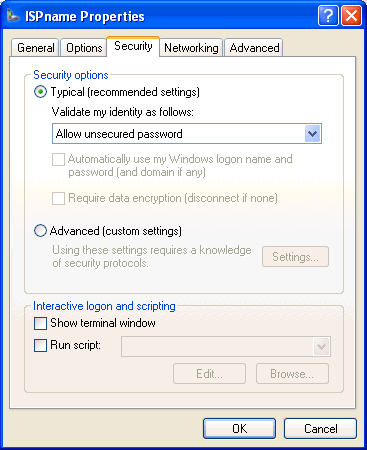
Click on the Security tab to see the next window. Choose the Typical option at the top by clicking to put a dot in the circle as shown below. The "Show terminal window" is optional and most users find it annoying. Don't select the "Run script" option unless you are a serious computer expert with a specific need to use that option.
<next>
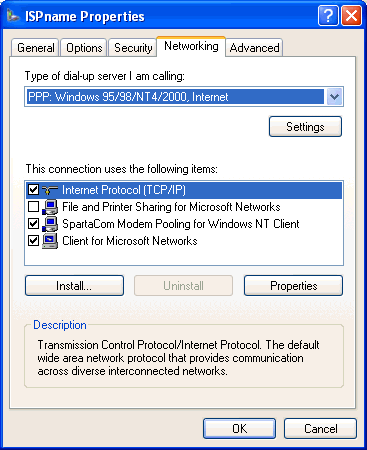
Click the Networking tab at the top to see the following options. Several of the settings in this window are very important. First of all, you must have the "PPP: Windows 95/98/NT4/2000,Internet" option selected. If it isn't, click the arrow at the right of that top box to choose it.
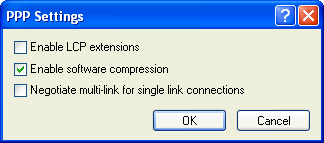
If you click on the Settings button underneath PPP then you will see the PPP Settings window below. The PPP Settings window has a few options. You do not want to enable the LCP extensions as a general rule. You also don't want to negotiate multi-link for most ISPs. You do want to Enable software compression 98% of the time. You can connect without this enabled but your downloads won't be as fast.
When finished, click OK to return to the previous Networking tab. You need a checkmark for "Internet Protocol (TCP/IP)". If this option is not listed at all, click the Install button and add it. The other options are not needed but can be added. Note: If you are using FrontPage for website development then you will also need Client For Microsoft Networks. Even if you aren't using FrontPage, it is generally preferred to have Client For Microsoft Networks installed.
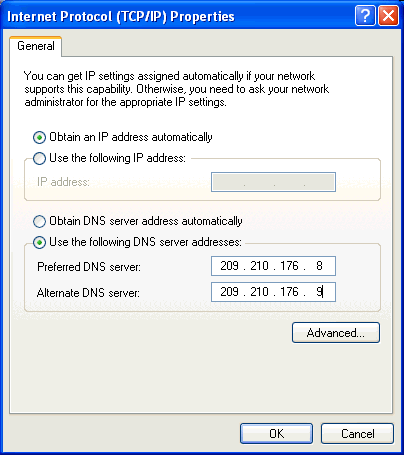
If you highlight Internet Protocol (TCP/IP) and click Properties, you will see the TCP/IP Properties below.
Only "specify" an IP address if you have paid extra for a static IP with your ISP (which is unlikely). Most people will need to stick with Obtain an IP address automatically. Set the DNS numbers to 209.210.176.8 and 209.210.176.9 You can click the Advanced button on the TCP/IP Properties for additional settings.
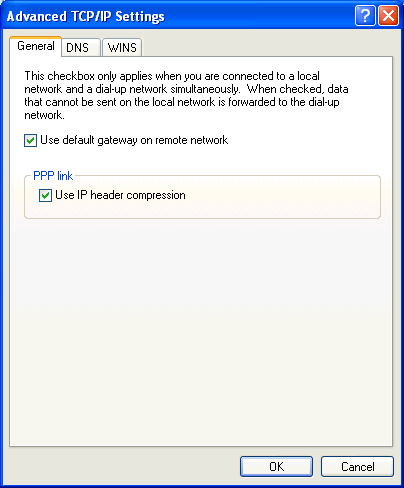
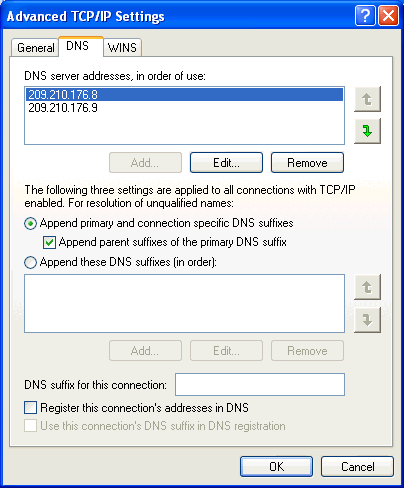
On the General Tab, ensure that "Use default gateway on remote network" is checked. If this is not checked and you have a home network, you may be able to connect to the Internet but unable to browse. Also, "Use IP header compression" should be checkmarked. On the DNS tab, the default settings pictured below are appropriate.
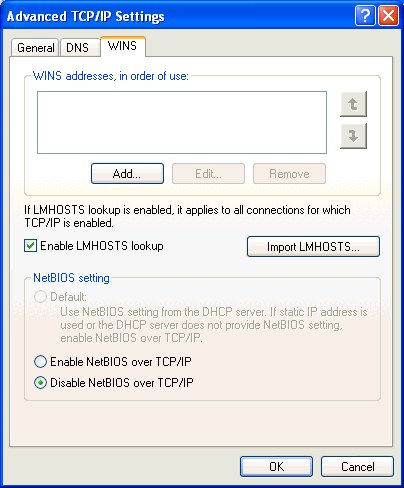
For an Internet connection the WINS tab is rarely used. One exception might be VPN connections to work, but your Network Administrator would set this up for you.
Ensure that Disable NetBIOS over TCP/IP is selected. <next>
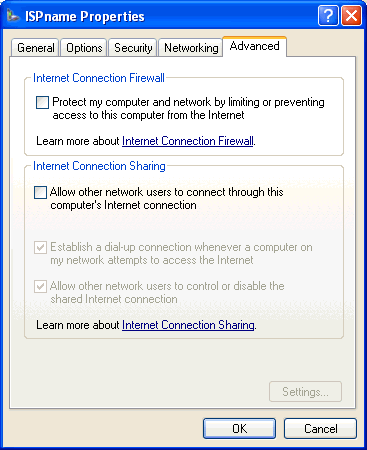
Click on the Advanced tab at the top to make sure nothing is check-marked in the Advanced tab. The configuration should be identical to the picture below. Many virus protection software suites come with Firewall software that provides a much more effective alternative.
<return to top> <windows home page>
Last Update: Thursday, July 03, 2003 |
