|
|

|
|
|
Windows XP Dial-Up Modem & Control Panel Configurations
Quick Links: Existing Connection | Control Panel: Phone & Modem | LAN/Broadband | System
Restore |
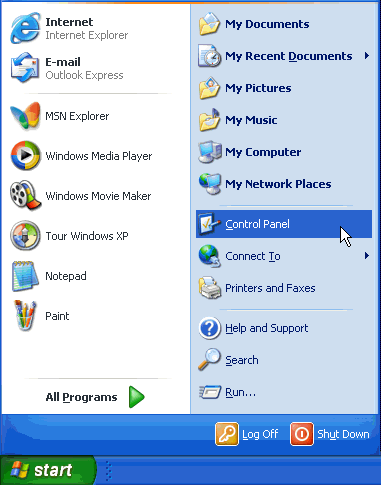
Connection Wizard: Use the Connection Wizard to create or replace a dial-up connection. Click the Start button and select Control Panel as pictured below.
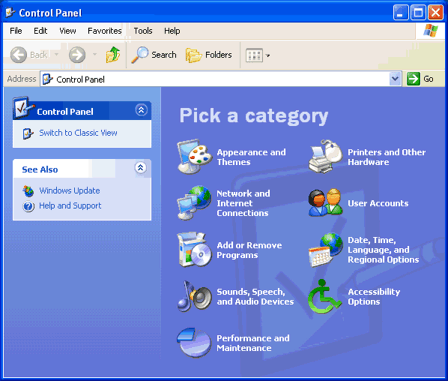
Windows XP gives you the option to view the Control Panel in
"Category View" or "Classic View".
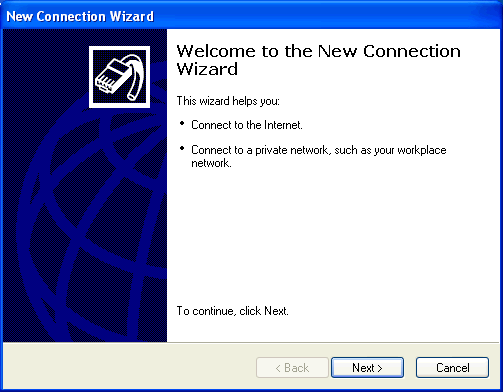
The New Connection Wizard appears.
Click Next.
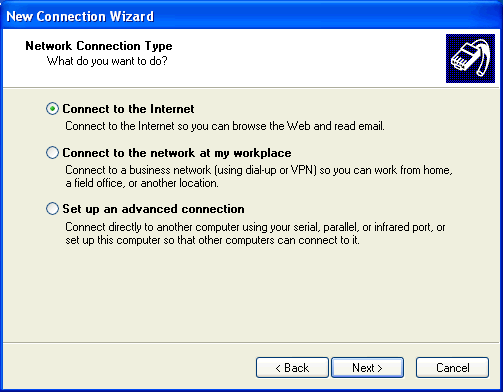
This screen asks you to select a connection type. Even if you have DSL, select Connect to the Internet and click Next.
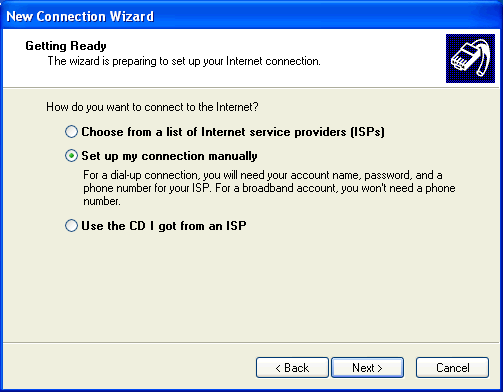
Choose the Set up my connection manually option. Click Next.
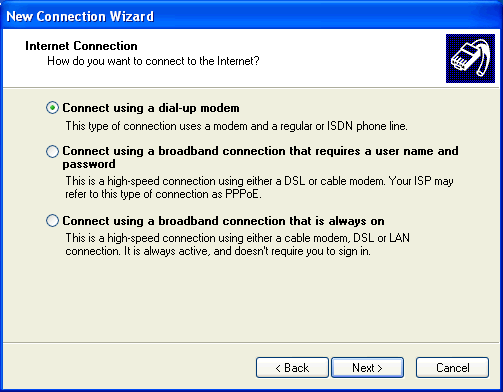
Click to choose the Connect using a dial-up modem option and click next.
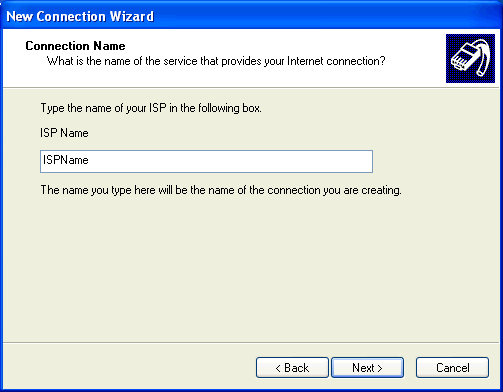
Name the connection after your ISP . Click Next.
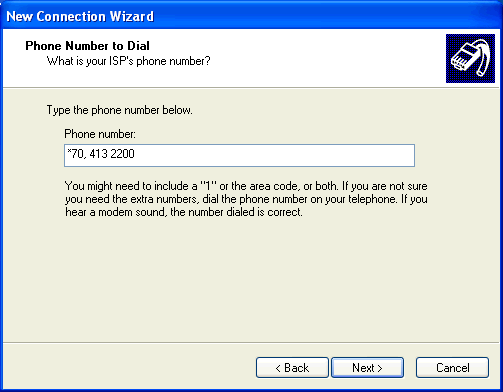
Be sure to include the area code if your area uses 10-digit dialing (you should already know if you do). You can disable call-waiting by adding "*70," to the beginning of the number. Click Next to continue.
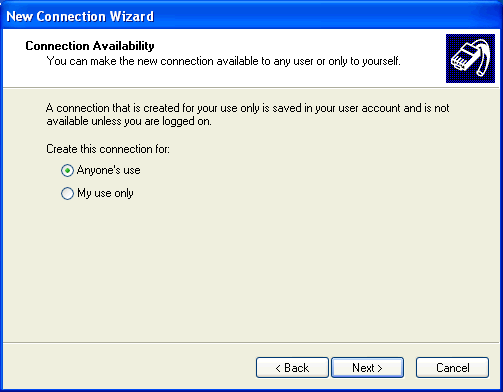
Generally, you want to choose the Anyone's Use selection and then click Next.
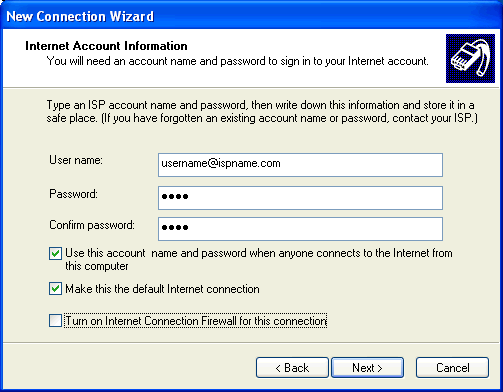
Put in your username and password to connect to your ISP . Be sure to add @ ispname.com (or .net) to the end of the username so that it looks like an e-mail address. This guarantees that you route to your ISP rather than somewhere else on the Internet. This is important because many ISPs often go through a single dial-up number in a manner similar to multiple airlines all flying from a single airport hub. The @ ispname.com on the username will make sure that you get to the right gate to catch your flight. Putting a checkmark in the first box is generally preferred. It helps programs like Internet Explorer and Outlook Express to connect automatically when launched. A checkmark in the second box for the default Internet connection is strongly encouraged unless you connect to more than one ISP on a regular basis. Do not put a checkmark in the last box for using a firewall. This can prevent you from connecting to most ISPs. Click Next when finished.
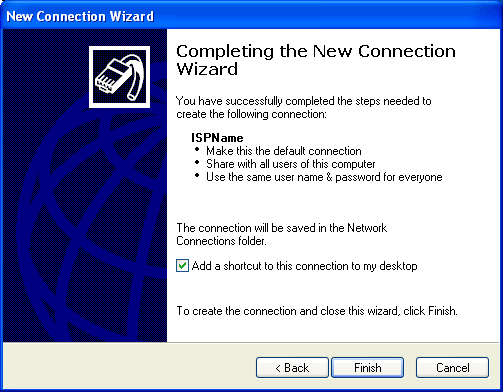
The next screen is a confirmation of the connection. A handy feature is the checkbox for adding a shortcut to your desktop. If you want to do that, add a checkmark to that box. Don't forget that you will still need to open your e-mail program to do e-mail and your browser (such as Internet Explorer or Netscape) to surf the Web. Click Finish and you are ready to connect to the Internet. <return to top> <windows home page>
Last Update: Thursday, July 03, 2003 |